Wednesday, February 24, 2016

Watercooler Wednesday Challneges #56

It's time for an "Anything Goes" challenge here at Watercooler Wednesday Challenges.  It's one of my favorites as I get to do whatever I want without anyone else telling me what to do.  :-)

Today I have another Easter card to share wtih you.  It's one I've made to send to my youngest son and his family.  For the card base I used Night of Navy cardstock.  On the inside of the card I added a layer of Whisper White.  I used the background stamp from the You've Got This stamp set and stamped it in Mint Macron ink.  The Happy Easter sentiment if from the Crazy about You stamp set.  It's stamped using Night of Navy ink.

For the front of the card, I cut out the oval using the Ovals Collection Framelits Dies.  The flower was stamped onto Whisper White using So Saffron ink and then punched using the Flower Medallion Punch.  The leaves were stamped onto Whisper White cardstock using Wild Wasabi ink.  Then, cut out using the Rose Garden Thinlits Dies.  I added a few Rhinestone Basic Jewels to add just a wee bit of bling.

Now it's your turn to show us what you've been working on.  Is is a card, a 3-D project or mixed media.  Be sure to link up by 1:00 p.m. on Monday, February 24.  We hope you'll join us this week.


For all the challenge details and to share your project, visit Watercooler Wednesday Challenges.

http://watercoolerchallenges.blogspot.com/

Thanks for stopping in at the Coffee Pot Stamping Cafe,

Marsha

Sunday, February 21, 2016

Christmas Card Challenges #12

It's an "Anything Goes" challenge for you this week at Christmas Card Challenges.  It's one of my favorites because I get to do whatever I want.  Today's card was very easy to make and makes water coloring so easy. 

For my card I Whisper White for the card base.  To that I added a layer of paper from Twelves Days of Christmas paper pad from Graphic 45.  Over that I used one of the 3x4 Christmas Watercolor Panels from Taylored Expressions.  To watercolor, I used my Faber-Castell Watercolor Pencils.  I love those things!  All you have to do is color then, take your brush and add a bit of water to get the look you want.  So easy!  The sentiment I used is from the Reason for the Season stamp set and I stamped it in Basic Black Archival ink.  Before adding the watercolor panel using dimensionals, I added some 5/8" Whisper White Organza Ribbon.  A few Rhinestone Basic Jewels and it was done. 

All Stampin' Up!® product unless otherwise noted.

For all the challenge details and to share your project, visit Christmas Card Challenges.

http://christmascardchallenges.blogspot.com/

Thanks for stopping in at the Coffee Pot Stamping Cafe,

Marsha

Thursday, February 18, 2016

Wacky Watercooler Celebrating the Occasions in Our Lives Blog Hop

http://wackywatercoolerstamping.blogspot.com

Hello and welcome to our February Wacky Watercooler Blog Hop.  This month we are celebrating the different occasions in our lives.  So, sit back and enjoy all the great projects from our line up of talented artists.

My first project is a card I made to send to my son and his family for Easter.  The card base is Cherry Cobbler.  Then, I added a layer of patterned paper from the Love Blooms Designer Series Paper Stack.  I love that paper!  I cut the rose from Whisper White using the Rose Garden Thinlits Dies.  Using Pear Pizzazz ink, I sponged the leaves and sponged Cherry Cobbler over the rose.  I glued it onto a layer of Whisper White and added a Pearl Basic Jewel to the center of the rose.  The sentiment is from the Teeny Tiny Wishes stamp set and stamped using Crumb Cake ink.  The sequins are from the Blushing Bride Sequin Trim.  What you can't see in the photo, is the shimmer that is inside the rose and the leaves using a Wink of Stella Brush.


My next project is one of the many birthday cards I make every year.  For this one I dug out an old favorite, the Bird Builder Punch.  I haven't used it in a long time.  The card base is Soft Suede.  I cut out an oval from the Ovals Collection Framelits out of Crumb Cake and sponged around the edge with Early Espresso ink.  For the leaves, I used Garden Green.  The flowers are punched from Marina Mist and Calypso Coral using the flower punch from the Itty Bitty Accents Punch Pack.  To the centers, I added Pearl Basic Jewels.  The bird is punched out of Night of Navy and Marina Mist with a Pearl Basic Jewel for the eye.  The sentiment is from the Sky is the Limit stamp set and stamped using Early Espresso ink.


Next up is the ever talented Christine Giuda, click the image below.  She does some fantastic things with paper and ink.

http://www.dancinstamps.blogspot.ca/

To revisit the great projects from Raquelle Clifton, who is a new addition to our blog hop, click on the image below. 

http://www.ladyandherstamps.blogspot.com/

And, you can always go back to the Wacky Watercooler Stamping Blog and start your tour over.  Click the image below because you won't want to miss anything!

http://wackywatercoolerstamping.blogspot.com

Thanks for stopping in at the Coffee Pot Stamping Cafe,

Marsha

Wednesday, February 17, 2016

Watercooler Wednesday Challneges #55

This week we have a great color challenge here at Watercooler Wednesday Challenges.  Jean shared this beautiful ring as inspiration.  We'd love to see how you interpret these great colors into a stunning design.  Be sure to link up with us by 1:00 p.m. Central Standard Time on Monday, February 22nd.

For this card I chose the sketch from the RetroSketches Challenge.  The card base is Pacific Point.  The Tempting Turquoise layer was cut in half using a die from the Botanical Builder Framelits Dies.  Then, I ran it through the Big Shot using the Boho Chic Embossing Folder.  The Perfect Plum flowers and the Mint Macaron leaves are also cut using dies from the Botanical Builder Framelits Dies.  Before cutting out the leaves, I stamped an image from the Botanical Blooms stamp set using Mint Macron ink.  To the center of each flower, I added a Candy Dots Brad Base.  The happy birthday is from the Endless Birthday Wishes stamp set.  It's stamped on Whisper White using Pacific Point ink.  I placed Rhinestone Basic Jewels in the center of each brad base.  The silver sequins are from the Silver Sequin Trim.


For all the challenge details and to share your project, visit Watercooler Wednesday Challenges.

http://watercoolerchallenges.blogspot.com/

The sketch I used is from the Retro Sketches Challenge.

http://retrosketches.blogspot.com/2016/02/retrosketches-202.html

Thanks for stopping in at the Coffee Pot Stamping Cafe,

Marsha

Sunday, February 14, 2016

Christmas Card Challenges #11

This week at Christmas Card Challenges we have a Color Challenge for you.  I love when we get to use non-traditional colors for a Christmas card.

For my card, I used a Basic Black card base.  On the inside of the card I added a layer of Whisper White cardstock and stamped a sentiment from the Wondrous Wreath stamp set in Basic Gray ink.  The layer on the front of the card is Whisper White.  I inked up the inside of the Chicken Wire Embossing Folder from Taylored Expressions with Smoky Slate ink and ran it through the Big Shot Die-Cutting Machine.  The Melon Mambo word Joy is cut using the die from the Wonderful Wreath Framelits Dies.  I added a few pink rhinestones inside the wire to give it a wee bit of bling.


For all the challenge details and to share your project, visit Christmas Card Challenges.  We'd love to see how you were inspired by the Color Challenge.

http://christmascardchallenges.blogspot.com/

The sketch I used is from the CAS(E) this Sketch Challenge.

http://casethissketch.blogspot.com/2016/02/case-this-sketch-159.html

Thanks for stopping in at the Coffee Pot Stamping Cafe,

Marsha

Wednesday, February 10, 2016

Watercooler Wednesday Challenges #54

This week I chose the Bouncing Brayer Technique for your Watercooler Wednesday challenge.  I love the look of it even though it can be somewhat messy to do.  Here are two great links with instructions on how to achieve the look.  The first one is from Kelly Achesonhttp://astampabove.typepad.com/my-blog/2007/06/tutorial-bouncing-brayer.html.  The second is from Charmaine Ikachhttp://www.splitcoaststampers.com/resources/tutorials/bouncing_brayer/.

For the card base I used Real Red cardstock.  The patterned paper is from the Love Blooms Designer Series Paper Stack.  I love that paper!  On Whisper White I bounced the brayer in Real Red, Blushing Bride and Pink Pirouette inks.  The heart is cut from Pink Pirouette using the Hearts Framelits Dies.  The sentiment is from the Delight Dozen stamp set and I used Real Red ink.  I added some Real Red Home for Christmas Enamel Dots and placed a Rhinestone Basic Jewel in the center of the stamped heart.  It was fun to pull out some retired product for this card that's headed to my favorite oldest granddaughter.


For all the challenge details and to share your project, visit Watercooler Wednesday Challenges.

http://watercoolerchallenges.blogspot.com/2016/02/wwc54-marshas-bouncing-brayer-technique.html
Photo by Kelly Acheson

Thanks for stopping in at the Coffee Pot Stamping Cafe,

Marsha

Sunday, February 7, 2016

Christmas Card Challenges #10

We have a wonderful inspiration photo for you this week here at Christmas Card Challenges.  My favorite color is blue so I always appreciate getting to use that color.

On a card base of Whisper White, I added a layer of Night of Navy.  Using Whisper White cardstock, I punched a border of stars using the Confetti Stars Border Punch.  For the moon, I used a 2" Circle Punch and lightly sponged around the edge with Night of Navy ink.  Santa in his sleigh and his reindeer are from the Stampin' Up!® Holiday Home stamp set and also stamped in Night of Navy.  The sentiment, stamped in Night of Navy, is from the Compliments of the Season stamp set from Waltzing Mouse.  It's stamped using Night of Navy.  The four evergreens are cut using the Evergreens Dies from Taylored Expressions.  I popped them up with some dimensionals.  I did add some Wink of Stella Clear Shimmer to each of the stars but it does not photograph well but it does make for a pretty effect on the card.  A few Rhinestone Basic Jewels.


For all the challenge details and to share your project, visit Christmas Card Challenges.

http://christmascardchallenges.blogspot.com/

Thanks for stopping in at the Coffee Pot Stamping Cafe,

Marsha

Wednesday, February 3, 2016

Watercooler Wednesday Challenges #53

It's sketch week at Watercooler Wednesday Challenges and Heidi has a great sketch to fire your imagination.  For this one, I decided to make a 5" x 5" card.  I rarely do odd sized cards but it was a nice change.

The card base is Basic Black.  To that, I added a layer of the Botanical Gardens Designer Series Paper.  The four squares are Cajun Craze.  The center square is Basic Black with a layer of Botanical Gardens Designer Series Paper.  The sentiment is from the Honeycomb Happiness stamp set.  It's stamped on Whisper White using Cajun Craze ink.  I used the Scalloped Oval Punch and added a border of Rhinestone Basic Jewels.  The Itty Bitty Accents Punch Pack flowers are punched from Mint Macaron.  Each flower has a Rhinestone Basic Jewel in the center.

Now it's your turn.  We'd love to have you join us and share your interpretation of the sketch.


For all the challenge details and share your project, visit Watercooler Wednesday Challenges.

http://watercoolerchallenges.blogspot.com/

Thanks for stopping in at the Coffee Pot Stamping Cafe,

Marsha

Sunday, January 31, 2016

Christmas Card Challenges #9

Christmas Card Challenges has an "Anything Goes" challenge for this week.  I was sitting at the craft table trying to decided what to do when all of a sudden this pile of scraps caught my eye.  So, I cut them into strips, added some Multipurpose Liquid Glue to keep them all together at the top and made a rather different kind of Christmas tree.

The sentiment from the White Christmas stamp set is stamped using Night of Navy.  The cardstock I used is Whisper White, Night of Navy, Garden Green, Home for Christmas, Trim the Tree and Glitzy Glitter for the star.  The star was cut using the smallest star from the Stars Framelits Dies.  I think it made for an interesting Christmas tree, don't you?


For all the challenge details and to share your project, visit Christmas Card Challenges.

http://christmascardchallenges.blogspot.com/

Thanks for stopping in at the Coffee Pot Stamping Cafe,

Marsha

Wednesday, January 27, 2016

Watercooler Wednesday Challenges #52

One of the things I determined to do in this new year, is to use it all up as in every scrap of paper.  This die-cut was left over from a previous project and when the "Anything Goes" challenge came up for this week's Watercooler Wednesday Challenges, I knew it would be perfect for a very simple but elegant thank you card for a friend.

The patterned paper rose is cut from the Love Blooms Designer Series Paper Stack and layered onto a card base of Blackberry Bliss.  The new Rose Wonder stamp set has an outline stamp that fits perfectly around the sentiment from the set.  I stamped them on Whisper White using Blackberry Bliss ink then, used the label die from the new Rose Garden Thinlits Dies which also has the rose and leaf die.  It's popped up with some dimensionals.  And, for just a wee bit of bling, I added a Rhinestone Basic Jewel in the center of the rose. 


For all the challenge details and to share your project, visit the Watercooler Wednesday Challenges.

http://watercoolerchallenges.blogspot.com/

Thanks for stopping in at the Coffee Pot Stamping Cafe,

Marsha

Sunday, January 24, 2016

Christmas Card Challenges #8

This week non-traditional colors are on tap for Christmas Card Challenge.  As you can tell, it's a color challenge.  I had fun with this one in that I put colors together that I never would have thought of putting together.  Tempting Turquoise, Rose Red, Mint Macaron and Blushing Bride.  I'd say that's quite a mix, would you?

The Season's Greetings sentiment is from the Happy Scenes stamp set and stamped in Tempting Turquoise.  I love that poinsettia image from the Reason for the Season stamp set.  It's stamped in Rose Red and Mint Macaron.  Cardstock used is Tempting Turquoise, Whisper White, Mint Macaron and Love Blooms Designer Series Paper Stack.  In the center of the poinsettia, I added one medium Rhinestone Basic Jewel and surrounded it with small ones.  I just needed a little bling!


For all the challenge details and to share your project, visit Christmas Card Challenges.

http://christmascardchallenges.blogspot.com/

Thanks for stopping in at the Coffee Pot Stamping Cafe,

Marsha

Thursday, January 21, 2016

Wacky Watercooler January Mini Blog Hop Number Two


Welcome to the second Wacky Watercooler Blog Hop of the 2016.  We're here again to show off some of the great new projects from 2016 Occasions Catalog and the 2016 Sale-A-Bration Brochure.  The Watercooler gals have lots of fantastic projects to share with you.

My first project features the Honeycomb Happiness stamp set from the Sale-A-Bration Brochure.  It's found on page 15.  I totally love this little chick.  It reminds me of all the soft, fluffy baby chicks that my grandmother raised.  So cute!

The card base is Whisper White Thick.  I stamped the chick and the balloon images with StazOn onto the Whisper White then, stamped the balloon on a scrap from the Cherry On Top Designer Series Stack and the chick onto Daffodil Delight.  I fussy cut the chick and balloon and placed those pieces on the images stamped on the card base.  For the ribbon on balloon and the beak and feet on the chick, I used a Calypso Coral Stampin' Write Marker.  The sentiment is from the Teeny Tiny Wishes stamp set.


For my second card, I needed a touch of spring given it's been so cold and snowy here.  I love to sit on a park bench and simply enjoy the day.

The card base is Marina Mist to which I added a layer of patterned from Botanical Gardens Designer Series Paper.  I stamped the image from the Happy Home stamp set found on page 21 of the Occasions Catalog in StazOn onto Whisper White.  I sponged a bit of Soft Sky and Pear Pizzazz over it and overlaid it with a window cut from Marina Mist using the Hearth & Home Framelits Dies.  The sentiment is also from the Happy Home stamp set.  I then added a few Garden Green Candy Dots.


Next up on your tour is the talented Jackie Susnik.  She always offers such wonderful projects.  Click the image below to see what she has created.

http://jackotterstamp.blogspot.com/

If you'd like to see the wonderful projects from Heidi Weaver again, click the image below.

http://heidistampinalong.blogspot.com/

If you'd like to start your tour over, click the image below and you'll be back at the Watercooler Stamping Blog.

http://wackywatercoolerstamping.blogspot.ca/

Thanks for stopping in at the Coffee Pot Stamping Cafe,

Marsha

Wednesday, January 20, 2016

Watercooler Wednesday Challenge #51

Clean And Simple (CAS) with a Star is Bev's challenge for us this week at the Watercooler Wednesday Challenge.  For my card I simply cut out three sizes of stars from the Cherry On Top Designer Series Paper Stack using the Stars Framelits Dies.  I layered them on the front of the Whisper White card base and popped up the two smaller stars with dimensionals.  The sentiment is from the Pictogram Punches stamp set and stamped using Bermuda Bay ink.  Clean and simple and so easy to make.  


For all the challenge details and to share your project, visit the Watercooler Wednesday Challenge.

http://watercoolerchallenges.blogspot.com/

Thanks for stopping in at the Coffee Pot Stamping Cafe,

Marsha

Sunday, January 17, 2016

Christmas Card Challenges #7

Welcome!  This week Christmas Card Challenges has a great inspiration photo for you.  Gold is not one of the colors I go to much, I'm actually a silver person.  But I do like the way the Gold Foil paper cut using the Sweater Weather Cutting Plate from Taylored Expressions.  I love all the detail.

Real Red and Very Vanilla paired nicely with the gold, don't you think?  I pulled out two favorites for the label.  I stamped the sentiment from Christmas Lodge in Real Red and die cut it using Lots of Labels Framelits Dies.  I popped up the label with some dimensionals and added just a bit of bling in Champagne rhinestones.

One thing I discovered is that shiny gold does not photograph well.  Then again, it could just be the photographer.  I'm still learning.


For all the challenge details and to share your project, visit Christmas Card Challenges.

http://christmascardchallenges.blogspot.com/

Thanks for stopping in at the Coffee Pot Stamping Cafe,

Marsha

Friday, January 15, 2016

What makes You Happy?

Cold is settling in back here in Iowa.  So, I'm doing more of what makes me happy, making cards and entering challenges.  It's a great way to while away the winter days.

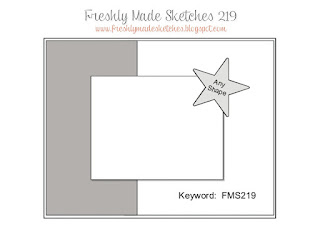
For today's card, I used an Elegant Eggplant base.  The color layer on the left is from the new Perfectly Artistic Designer Series Paper found in the 2016 Sale-A-Bration Brochure.  I have to say I just love that paper.  To the right side, I added of layer of Whisper White that uses the new Splatter Embossing Folder from Taylored Expressions.  The sentiment on the center layer is from the Hello Life stamp set.  It's stamped in Crumb Cake.  To add a bit more color to the mostly Whisper White card front, I punch Elegant Eggplant flowers using the flower punch from the Itty Bitty Accents Punch Pack.  For the final touch, I added Rhinestone Basic Jewels to the center of each little flower and to the bottom left corner.


The sketch I used is from Freshly Made Sketches.

http://freshlymadesketches.blogspot.com/2016/01/freshly-made-sketches-219-sketch-by.html

Thanks for stopping in at the Coffee Pot Stamping Cafe,

Marsha

Thursday, January 14, 2016

Just for You

Today's card, made for my oldest granddaughter, was inspired by the Stampin' Royalty challenge.  The challenge was to make a one layer card.  Since the card has to travel from Iowa to Nevada, a one layer card is perfect for mailing.

The card base is Whisper White Thick.  First, I stamped the background from the You've Got This stamp set using Mint Macron.  I stamped off twice so it would be a light background.  On top of that, I stamped the sentiment from the new Sale-A-Bration Botanicals for You in Rich Razzleberry.  The little flowers, from the same stamp set, are stamped using Watermelon Wonder, Hello Honey and Lost Lagoon.  On the inside, stamped in Rich Razzleberry, is the sentiment "...because you're awesome."  It's also from the Botanicals for You stamp set.


The one layer theme is from the Stampin' Royalty Challenge.

http://stampinroyalty.blogspot.com/2016/01/stampin-royalty-challenge-sr312.html

Thanks for stopping in at the Coffee Pot Stamping Cafe,

Marsha

Wednesday, January 13, 2016

Watercooler Wednesday Challenge #50

When I first saw Jean's Quilt Style Paper Piecing Technique Challenge, I knew exactly what I wanted to do.  All I had to do was wait until my order arrived with the Rose Wonder stamp set and Rose Garden Thinlits Dies.  The paper I used is from the new Love Blooms Designer Series Paper Stack and the card base is Whisper White Thick.  The sentiment was stamped using Rose Red.

Being a novice quilter, I have a fascination for Trapunto Quilting.  For those unfamiliar with that quilting technique, here is a small summary.

"Trapunto quilting is a technique used to add another dimension to a quilt. Puffy, raised areas of quilting add a unique texture to a flat piece of art. Italian for embroider, this is also known as the "stuffing technique" because specific parts of the quilt are filled. Interestingly, this method of quilting has been around since the 14th century! Trapunto quilting can be done by hand or by machine."
Trapunto: Make Your Quilt Pop by Angela Mitchell

The complete article can be found here:  http://www.craftsy.com/article/trapunto-make-your-quilt-pop

Since there was no easy way to "stuff" the image, I came up with my own version of trapunto quilting for my card.  To begin, the rose image is cut right out of the front of the card base.  I then added a layer of Vellum to the front and to the back of it, to give it more stability and to give a filmy look to the image that is on the inside of the card.  Then, I glued the rose and leaf image to the inside of the card and filled in the rose.  Using the Rose Garden Thinlits Dies, I cut out the quilt pieces using different patterned paper from the Love Blooms Designer Series Paper Stack and put them in their places with Multipurpose Liquid Glue.  And, that as they say, is that!


For all the challenge details and to share your paper piecing project, visit Watercooler Wednesday Challenge.

http://watercoolerchallenges.blogspot.com/

Thanks for stopping in at the Coffee Pot Stamping Cafe,

Marsha

Tuesday, January 12, 2016

Sky Is The Limit

Sunshine through my windows always makes me happy even when the temperatures are below freezing.  Some how, it never seems so bad when the sun is shining and the skies are blue.

With Valentine's Day approaching, I've been making cards to send to my grandchildren.  The Sky Is The Limit stamp set from the Sale-A-Bration Brochure, makes for a perfect guy card.  Yes, I use pink and rhinestones on my guy cards, especially for Valentine cards.  I've not had any complaints thus far.  :-)

The card base is Melon Mambo to which I added the stamped layer of Whisper White.  The plane is stamped using Tempting Turquoise and I added a little Real Red heart punched from the Owl Builder Punch.  I added Rhinestone Basic Jewels to the center of the hearts and under the sentiment.  The sentiment and smoke trail are stamped using Real Red.  The three little clouds are stamped using Melon Mambo.


The colors I used are from The Paper Players.

http://thepaperplayers.blogspot.com/2016/01/pp277-color-challenge-from-claire_10.html

Thanks for stopping in at the Coffee Pot Stamping Cafe,

Marsha

Monday, January 11, 2016

Perfect Plum Flowers

Two posts in one day?  What's up with that, you may ask?  Well, I discovered a brand new challenge today and you know how I love challenges.  It's The Colour Tree Challenge from addINKtive designs.  I loved the colors for this one.

On the Very Vanilla card base, I added Early Espresso branches cut from the new Rose Garden Thinlits Dies.  The pretty Perfect Plum flowers and So Saffron centers are cut from the Botanical Builders Framelits Dies.  To the centers I added a Rhinestone Basic Jewels.


You can find the beautiful colors I used at The Colour Tree Challenge.

http://addinktivedesigns.blogspot.ca/2016/01/the-colour-tree-challenge-1-and-free.html

Thanks for stopping in at the Coffee Pot Stamping Cafe,

Marsha

Love

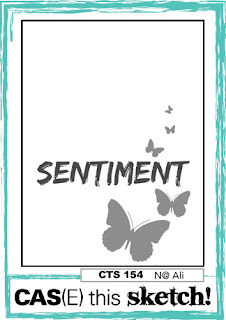
Today finds me thinking about Valentine's Day.  It's just over a month away.  The colors from the Sunday Stamps Challenge were perfect for a Valentine card.  I combined it with the great sketch from CAS(E) this Sketch Challenge.
The card base is Whisper White Thick cardstock.  At first I had a layer of Crumb Cake but it just didn't look right to me.  So, I grabbed a piece of patterned paper from the Love Blooms Designer Series Paper Stack.  Then, I added a layer of Blushing Bride.  The small hearts are punched from Crumb Cake and Watermelon Wonder using the heart punch from the Itty Bitty Accents Punch Pack.  The larger heart was punched from Whisper White using the Sweetheart Punch.  The love sentiment is from the Hello Life stamp set.  It's stamped using Crumb Cake ink.  I used a Wink of Stella Clear Glitter Brush to add some shimmer to the small hearts.  It doesn't show up well in the photo but it's very pretty in real time.  I added just a little bit of bling to the right of the sentiment in the form of a rhinestone.


The colors I used are from the Sunday Stamps Challenge.

http://sundaystamps.blogspot.ca/2016/01/ssc117-its-all-about-love.html

The sketch I used is from the CAS(E) this Sketch Challenge.

http://casethissketch.blogspot.com/2016/01/case-this-sketch-154.html